One of the advantages of still living with your parents is that
you never forget the big days i.e. your mom's birthday, your dad's
birthday, your parents' wedding anniversary, Mother's Day, Father's Day
etc. But once you're out and living on your own you're prone to
forgetting these red letter days.
 When it comes to buying gifts
for the important people in your life; like your closest family members,
a lot of suggestions that come your way include the phrase 'according
to their interest' but what these suggestions fail to take into account
is the fact that you may not of have seen your mom in over a month, the
last time you talked to her was last week and you never really got on
well with her when you were still living with your parents.
When it comes to buying gifts
for the important people in your life; like your closest family members,
a lot of suggestions that come your way include the phrase 'according
to their interest' but what these suggestions fail to take into account
is the fact that you may not of have seen your mom in over a month, the
last time you talked to her was last week and you never really got on
well with her when you were still living with your parents.
 Of
course none of this stops you from wanting to give your mom a superb
gift on Mother's day because she is your mom and no matter what your
differences were in the past, you still love her and appreciate all
she's done for you your whole life. The major setback here is that you
may not have an exact idea of what it is that your mom likes.
Of
course none of this stops you from wanting to give your mom a superb
gift on Mother's day because she is your mom and no matter what your
differences were in the past, you still love her and appreciate all
she's done for you your whole life. The major setback here is that you
may not have an exact idea of what it is that your mom likes.
 As a
kid you never paid attention and things like home made crafts and
flowers were a great hit with her so you never needed to think much
about your mothers day gifts. Fast forward to today when you realize
only a week in advance that mother's day is coming and you wonder what
on earth you could possibly get your mom. It has to be something special
because you don't know if she got a good valentine's Day gift and you
were probably slightly less generous when you bought her Christmas gift
but Mother's day is the day when it's just you and your mom.
As a
kid you never paid attention and things like home made crafts and
flowers were a great hit with her so you never needed to think much
about your mothers day gifts. Fast forward to today when you realize
only a week in advance that mother's day is coming and you wonder what
on earth you could possibly get your mom. It has to be something special
because you don't know if she got a good valentine's Day gift and you
were probably slightly less generous when you bought her Christmas gift
but Mother's day is the day when it's just you and your mom.
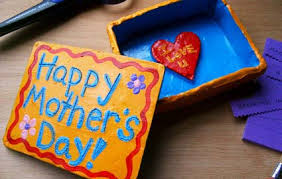 Let's
deal with the whole 'According to her interest' thing first. Lets say
you're mom is interested in knitting or cooking. Does that mean you buy
her a cookbook or the latest catalog for knitting patterns? It doesn't
make for an appreciative, mother's day gift
at all as much as it does for a birthday gift (and not a very good
one). People will tell you to show appreciation for your mom on Mother's
Day and they're pretty much spot on with that suggestion but the fact
is that it can't be accomplished with cookbooks or knitting needles.
Jewelry and flowers are not the answer either; because flowers are too
cliche and jewelry doesn't communicate much sentiment except for the
fact that you couldn't think of anything that your mom would like so you
went with safest choice in the world.
Let's
deal with the whole 'According to her interest' thing first. Lets say
you're mom is interested in knitting or cooking. Does that mean you buy
her a cookbook or the latest catalog for knitting patterns? It doesn't
make for an appreciative, mother's day gift
at all as much as it does for a birthday gift (and not a very good
one). People will tell you to show appreciation for your mom on Mother's
Day and they're pretty much spot on with that suggestion but the fact
is that it can't be accomplished with cookbooks or knitting needles.
Jewelry and flowers are not the answer either; because flowers are too
cliche and jewelry doesn't communicate much sentiment except for the
fact that you couldn't think of anything that your mom would like so you
went with safest choice in the world.
 So what should you get your
mom when you're almost out of time and pretty much dead on ideas?
So what should you get your
mom when you're almost out of time and pretty much dead on ideas?
Mymisi.com sells unique jewelry and unique mothers day gifts for special occasions
like mothers day. Try something different this year and visit MyMisi.