Pages

Showing posts with label misi. Show all posts

Thursday, July 9, 2015

Discover the Amazing Benefits of Creating Handmade Crafts

Crafting has always been a popular hobby for millions of people. If you want to start a new hobby or teach creative activities for children, making beautiful crafts from different materials is a nice option. You do not have to be an artist or an exceptionally gifted person to make handmade crafts. As long as you have the right motivation, talent, and a bit of patience, you can become a crafts master in no time.


Although many people consider crafts making as a hobby, you can actually get more benefits from this kind of activity. So here are some of the most amazing benefits you can enjoy from creating hand crafted items.


Creating Handmade Crafts Can Soothe Your Senses


You probably know already that some people create works of art to fight stress. They usually paint, sketch, or sculpt. Others resort to woodworking, origami making, or metal crafting when they want to relax. Like these activities, crafting can help your mind and body to relax. The process of creating something beautiful from scratch can effectively take your mind away from your problems. So if you want to soothe your senses and forget stressful thoughts, try making hand crafted works of art today.


Crafting is Cheap and Easy

As mentioned earlier, almost everyone can become a crafts master. It only takes a little bit of creativity to make something special out of the ordinary things you see everyday. This hobby does not really require expert skills. As long as you are properly motivated, you will be able to create different crafts that you can be proud of. But the best thing about handmade crafts is the fact that they are very cheap to produce. In fact, you can just use recycled items, junk items, and discarded things. There is no need for you to buy expensive art materials and tools.


Crafts are Perfect Personalized Gifts

Today, it is very tempting to give gifts that you have bought from novelty shops. Sometimes, you really do not think much about giving personalized gifts. You simply get something off the shelf, wrap it, and send it your friend or relative. Gift giving, however, should have a special meaning. There is a need to personalize the things you send to the special persons in your life. Handmade crafts are your perfect solution. If you personally create something truly special, your loved ones and friends will remember you for your thoughtfulness.


Making Money from Crafts
Did you know that you can make a stable side income from craft making? If you have perfected your techniques, you can easily sell your creations to make extra money. In fact, some people have established their own personalized crafts businesses and they are making a steady income. There are many ways to can sell your creations. You can join local arts and crafts fairs and display your creations for everyone to see. These fairs will allow you to sell your items. You can also sell handmade creations online. There are websites that provide income opportunities for crafts makers. If you want to sell your lovely products or buy the others we have make sure to visit www.mymisi.com :)

Wednesday, January 21, 2015

5 Reasons to Make Handmade Gifts

Handmade gifts are not only unique and more valuable, but they can also be fun and relaxing to make. Yes, handmade gifts can be time consuming to make, which is most likely why most of us choose not to make them. However, there are many reasons to make your own gifts, many of which will outweigh the time issue.

Here are 5 of them:

Unique.
Handmade gifts are always unique. They have your personal touch - a touch that will always remind your recipients of you when they use your gift. And isn't that what you want?

Fun and Relaxing.
Making handmade gifts can be fun and relaxing to make.
No matter which craft you choose, once you get going you'll find your worries and other stress begin to disappear.


Inexpensive.
Ha! you might think. But, no really, handmade gifts can be inexpensive. It can be expensive when you first get started as you will need to go out and get all your tools to actually do the craft. But once you have the basic tools, all you need is the material, which in many cases is cheaper than if you were to purchase the gift.
In addition, staying home and crafting is a lot cheaper than going to the movies on Friday nights.


Environmentally Friendly.
Making your own gifts can help to save the environment. How you might ask? Because when you make things at home, you are not utilizing large machines that require a lot of energy. You are using your own energy to make the item with your hands. Thus, the need for huge factories is eliminated.

Says You Care.
Last but not least, there is nothing that says you care like a handmade gift. Time is the most precious gift that we have today. Simply put, time is money. And by taking the time to make something unique tells the recipient they were important enough for you to take the time and make something for them.


If you need some ideas and want to see how our users did it than visit www.mymisi.com

Monday, May 12, 2014

How to Sign Up for Pinterest

Pinterest is an image-based social media site that allows you to share your cool things that you find across the web! This article helps you to signup for an account and get started.
  1. Signup for Pinterest Step 1.jpg

    Go to the Pinterest.com website. It's found at: http://www.pinterest.com. If you don't have an account already, click "Signup" on the home page. Check your email and click on the link that is sent to you to create an account. Alternatively, you can signup thru Facebook too.
  2. Signup for Pinterest Step 2.jpg

    Log in. You can log in with either Facebook or Twitter. Create a password to go with it.
  3. Signup for Pinterest Step 3.jpg

    Click on images or items that catch your interest. Then click on "Follow People." Doing this will get you started on the site.
  4. Signup for Pinterest Step 4.jpg

    Check out the people you're now following. You can unfollow later, if you choose.

Thursday, May 8, 2014

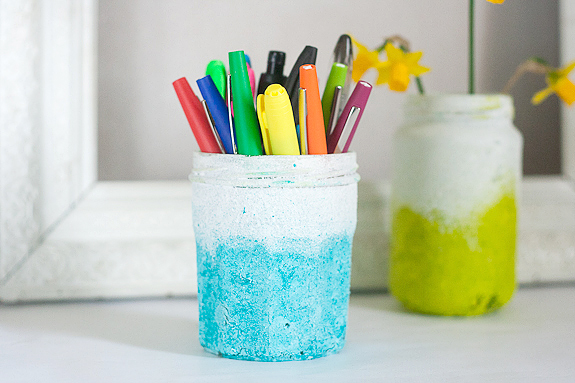
Make a Textured Ombre Pen Pot or Vase

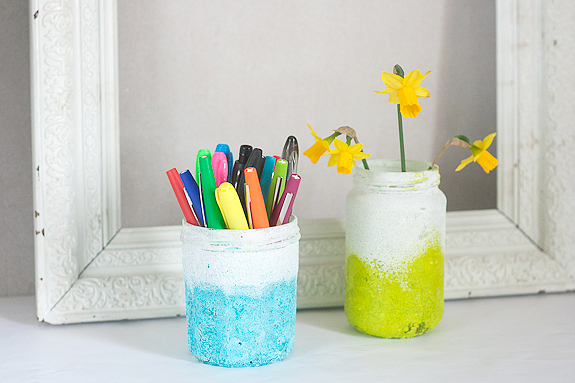
My desk needs a bit of sprucing up. My big plan is to sand it completely to remove the stain, and then paint it white, or maybe yellow. In the mean time I decided to work on a smaller project to make my work area a bit more cheerful. I spend a lot of time sitting at my desk, so I wanted to have a cheery pop of colour there. I decided that a new pen pot would be just the thing! And while I was at it I made a vase too.

Textured Ombre Pen Cup and Vase
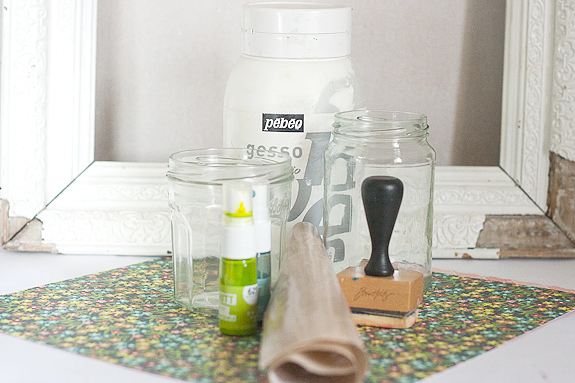
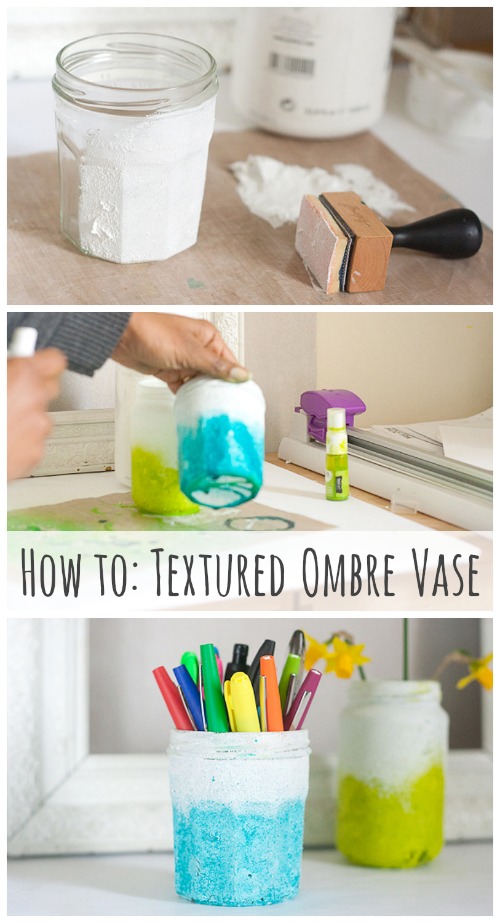
Supplies for a Textured Ombre Pen Pot:
  • Empty jam or mason jars. ( I always have a ton of these I keep, you?)
  • White gesso
  • Spray ink
  • A sponge dabber
  • Non-stick craft mat.
Textured Ombre Pen Cup and Vase Supplies
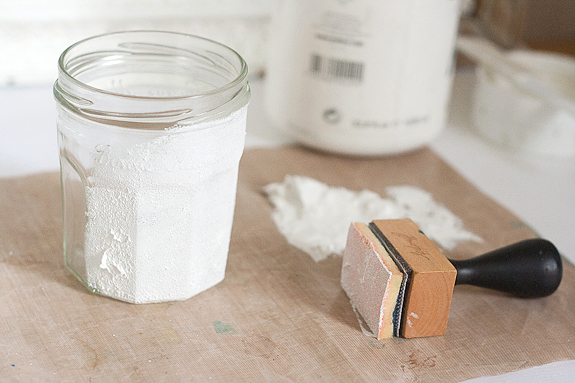
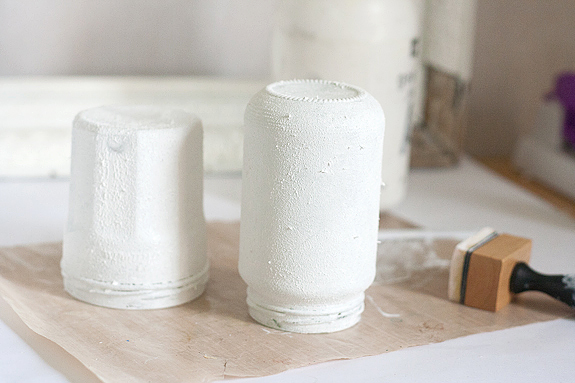
1. Measure out some white gesso onto your non-stick mat, and using the sponge dabber apply it all over the glass jars in a, well a dabbing motion
Textured Ombre Pen Cup and Vase Gesso
We’re going for texture here, so don’t worry too much about it going on evenly. Once the jars are completely covered, turn upside down to dry.
Textured Ombre Pen Cup and Vase Drying Gesso Texture
Luckily gesso dries pretty quickly, so it’s not a long wait!
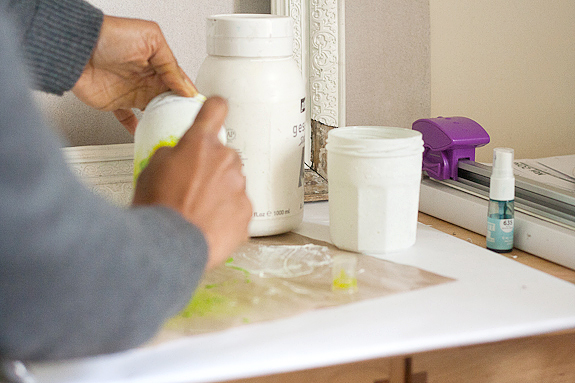
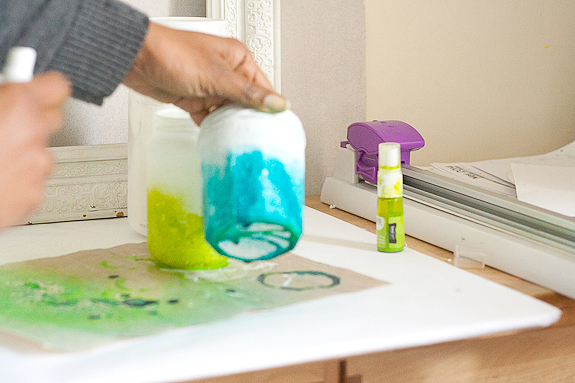
2. Holding the jar by the rim, spray the ink on the lower part of the jar while turning it at the same time
Textured Ombre Pen Cup and Vase Container DIY

Textured Ombre Pen Cup and Vase DIY
This part is very unpredictable, so you have to be up for surprises! If you’d like a more even  edge, you can put some painter’s tape around the top part of the jar. To get deeper colours, you can apply several coats of the ink.
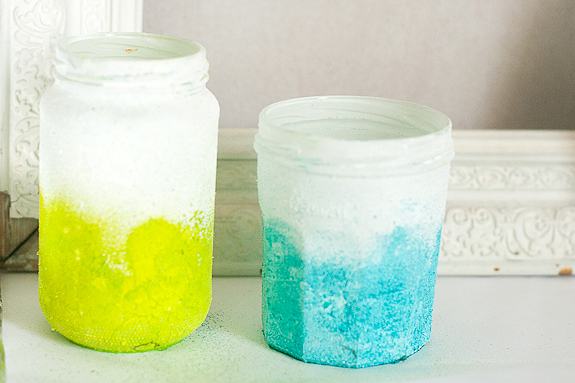
DIY Textured Ombre Pen Cup and Vase
Now wait to dry, and that’s it! Time to add pens and flowers
Textured Ombre Pen Cup Container
I love the weather beaten look of these, and the pen pot is the perfect touch for my somewhat drab desk.
Other Ideas
  • You could make these in a rainbow of colours for a themed event.
  • Or paint different shaped jars in the same colour for some uniformity.
  • Instead of spray ink, experiment with acrylic paints or washes.
Enjoy!
How-to Textured DIY Ombre Vase
Visit MyMisi for Amazing Handmade Creations!

Wednesday, May 7, 2014

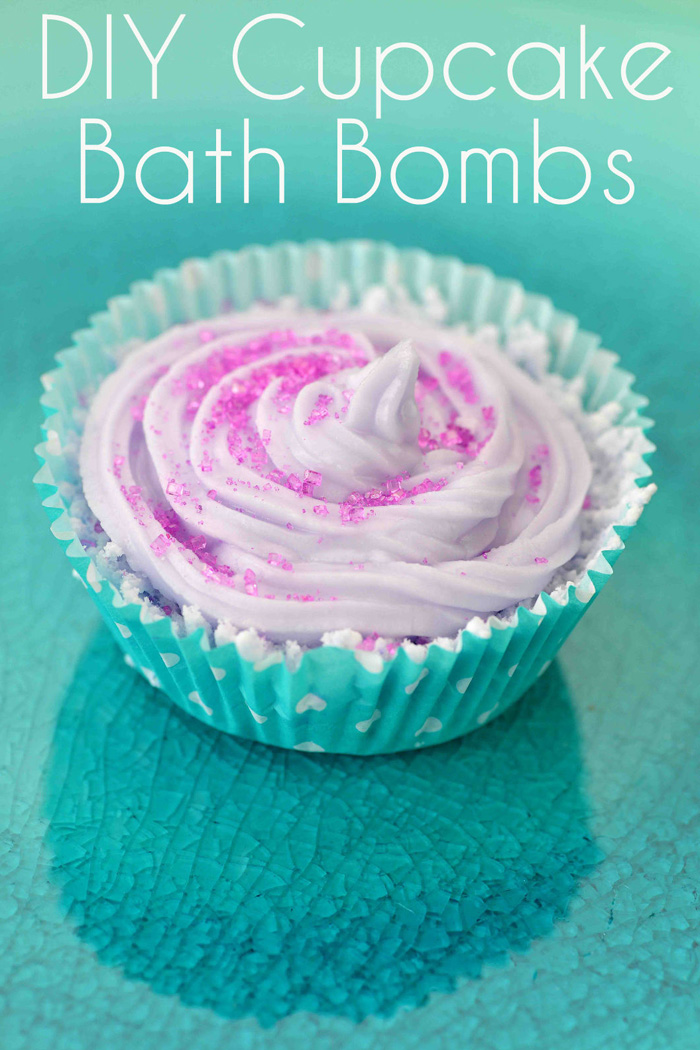
DIY ~ Cupcake Bath Bombs

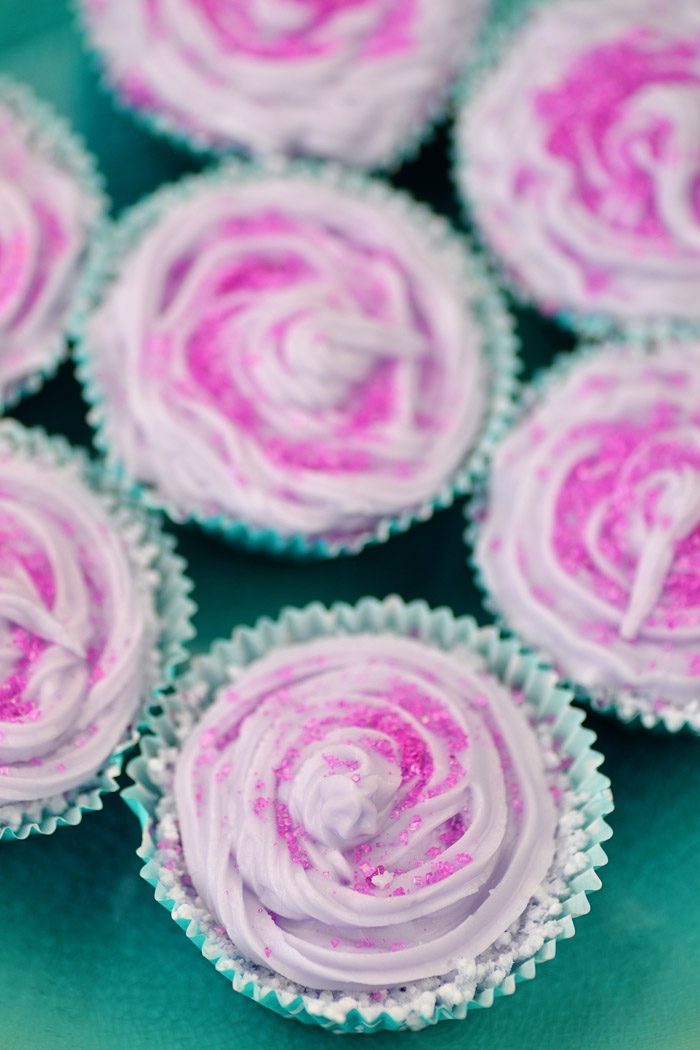
cupcake bath bomb
Warm bath + cupcakes – guilt. Now that’s an equation anyone can love!
Although these cupcakes look good enough to devour, they are  DIY Cupcake Bath Bombs that will add fizz, fragrance and moisturizer to your bath water. We think they make perfect wedding shower favors – especially for a spa-themed bridal shower, so we are going to teach you how to make them.
 bath bomb cupcakes
Ingredients for DIY Cupcake Bath Bombs (Adapted from Little Birdie Secrets Bath Bomb Fizzy Recipe. )
Makes 11-12 cupcakes.
For the cupcake you will need:
  • 1 cup. baking soda
  • 1 cup Citric Acid
  • 1 Tbsp. oil (We  used Sweet Almond Oil, but you can also use grapeseed oil or olive oil)
  • 5 drops fragrance/essential oil (we used lavender essential oil)
  • 3-5 drops coloring or Pigment powder (You can use food coloring, but we used soap colorant or Pigment powder)
  • Witch hazel (poured into a spray bottle)
  • Colored sugar or sprinkles
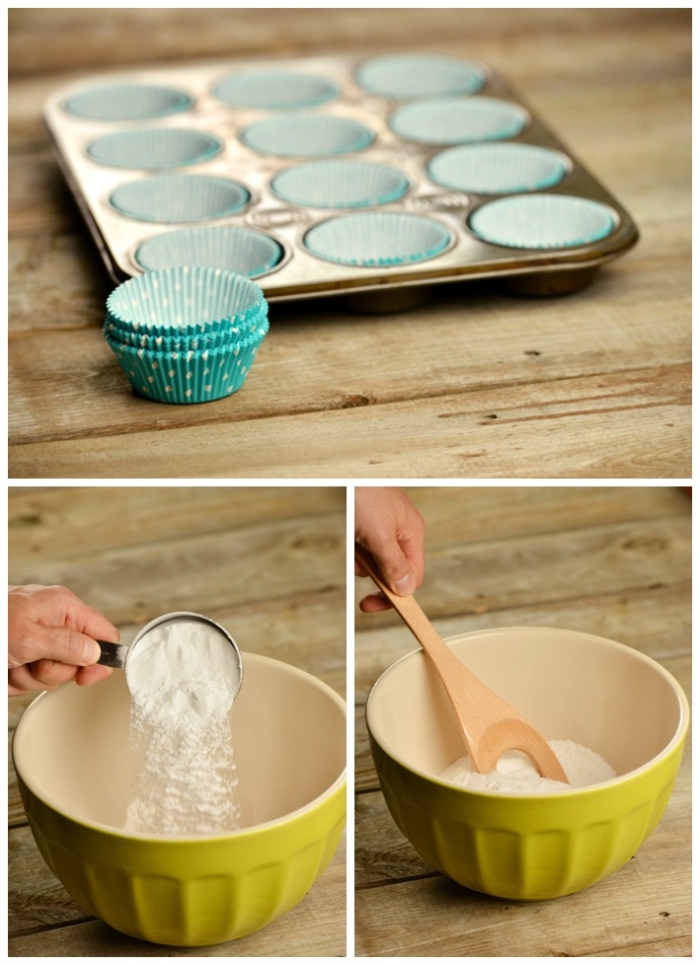
  • Paper cupcake liners
  • cupcake pan
For the icing you will need:
  • 3 Tbsp. meringue powder
  • 1 lb. (measured by weight) powdered sugar
  • 1/4 tsp. Cream of Tartar
  • 5-6 Tbsp. warm water
  • Few drops of color or Pigment powder or soap colorant
  • Few drops essential or fragrance oil
  • colored sugar
  • Glass bowl
  • Hand mixer
  • pastry bag
  • Large tip for pastry bag
Place cupcake liners in cupcake pan. Place all dry ingredients in a bowl and give it a stir.

bath bomb diy cupcake
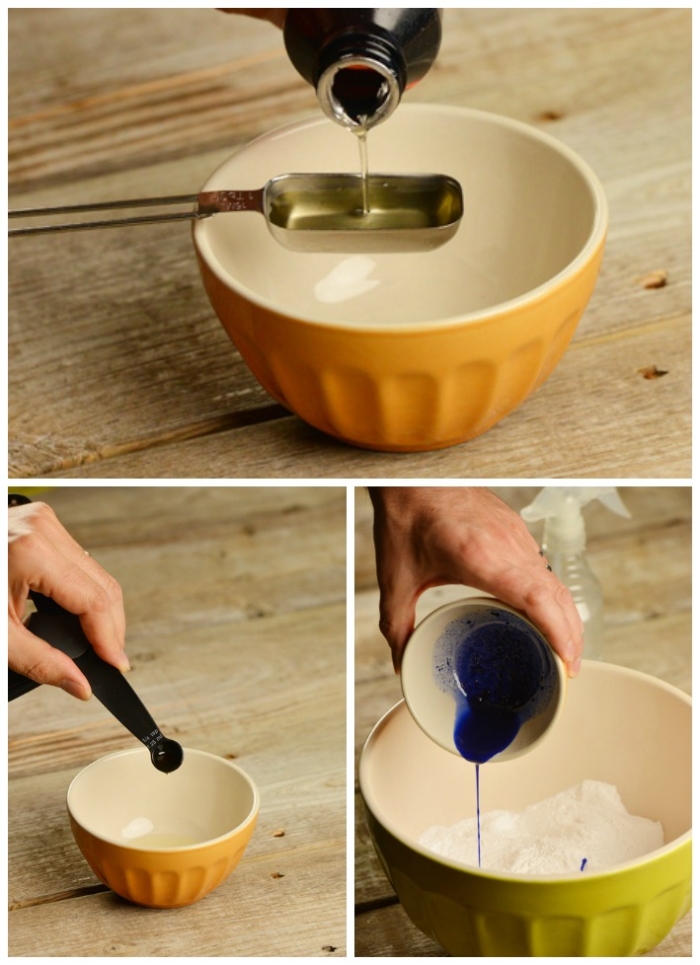
Pour sweet almond oil, essential oil or fragrance oil and color into a small bowl and stir. Add mixture to dry ingredients and stir.
bath bomb cupcake
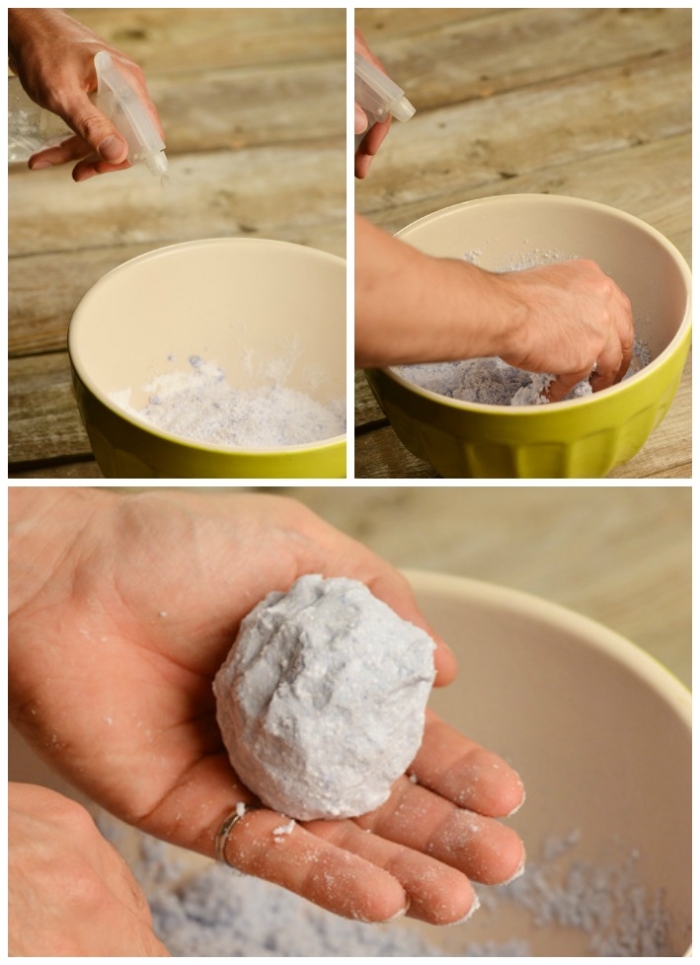
Spray mixture with witch hazel. Mix with your hands. Keep spraying and mixing until the mixture feels like wet sand. When it’s ready, the mixture should clump together so that you can form a ball. That said, be careful not to get the mixture too wet because too much moisture could activate the citric acid, ruining your bath bomb.
diy cupcake
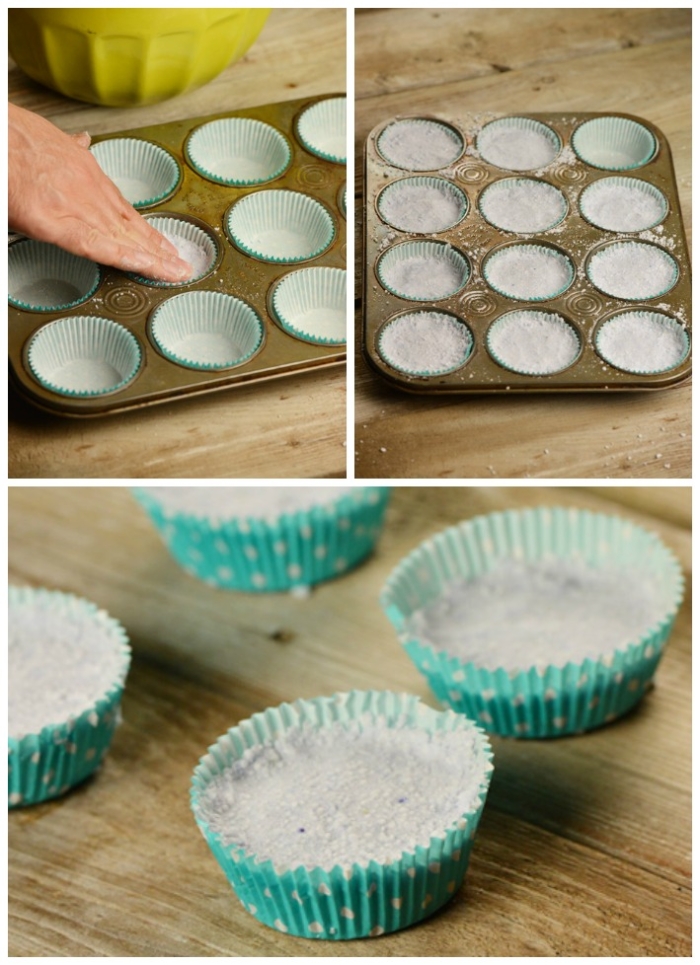
Add mixture to cupcake liners. Fill about 2/3 full. Press down with fingers. Set aside for 10 minutes, then remove from cupcake pan.
recipe bath bombs
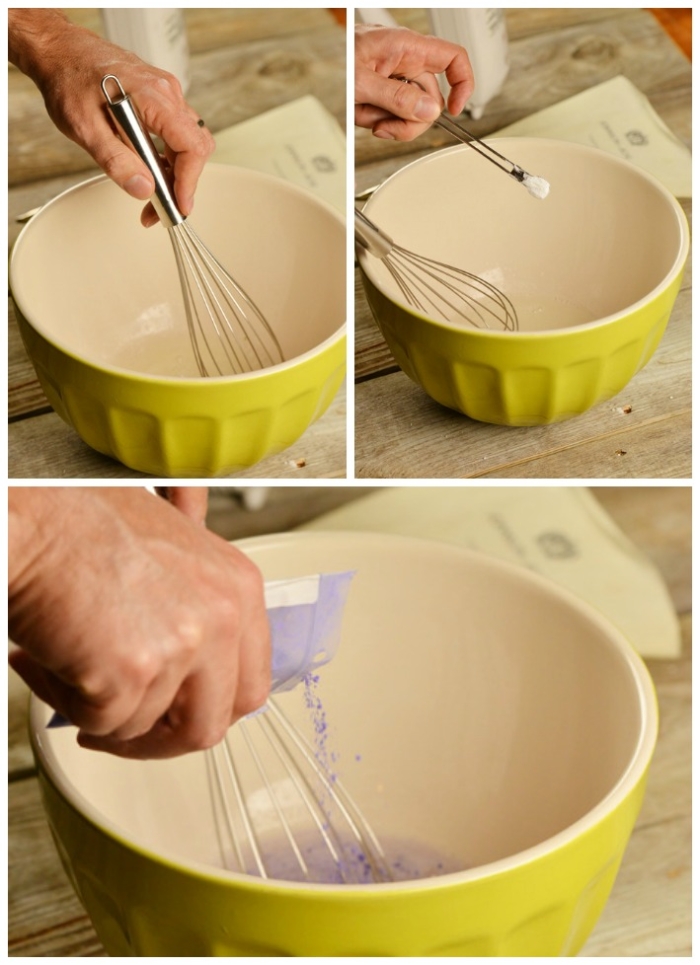
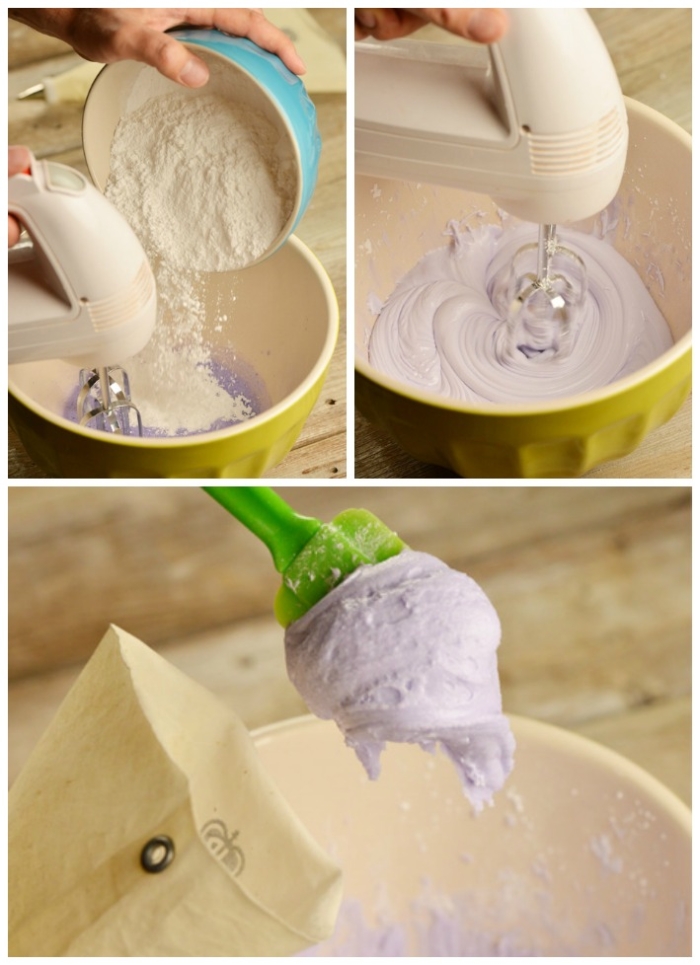
Now it’s time to make the frosting. Mix meringue powder with warm water in a glass or ceramic bowl. Add cream of tartar and color.
cupcake bath bomb
Add powdered sugar. Using a hand mixer, blend on high setting. If your mixture feels too stiff, add another tablespoon of water. Beat for 7-9 minutes. Icing is done when it forms stiff peaks and is thick like, well, frosting. Place inside a pastry bag.
recipe-cupcake-bath-bomb
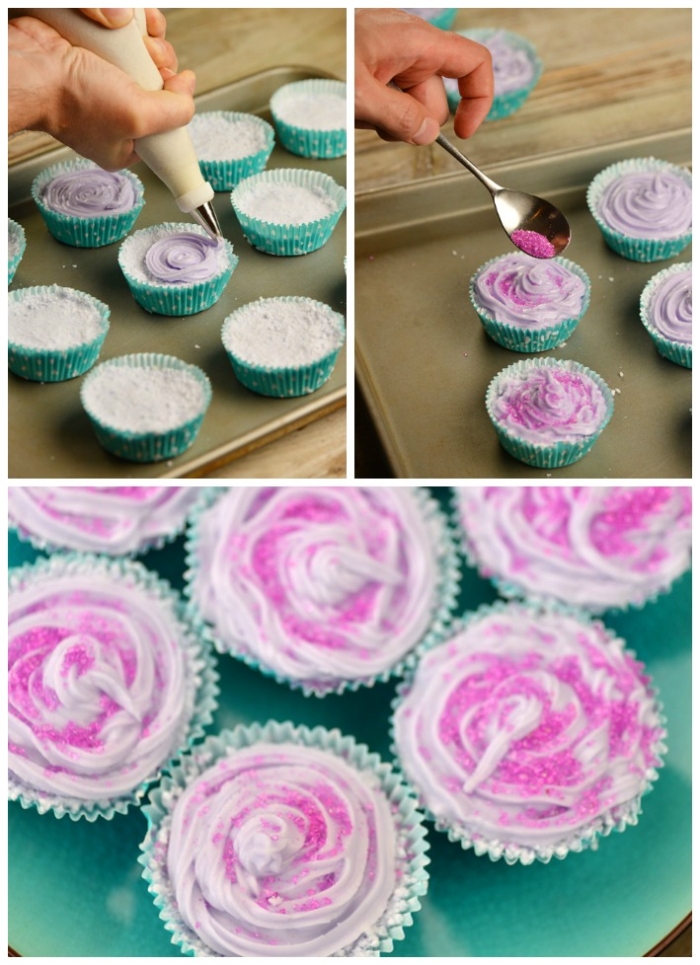
Carefully frost your cupcakes.  Once the cupcakes are frosted, add colored sugar or sprinkles.
recipe cupcake bath
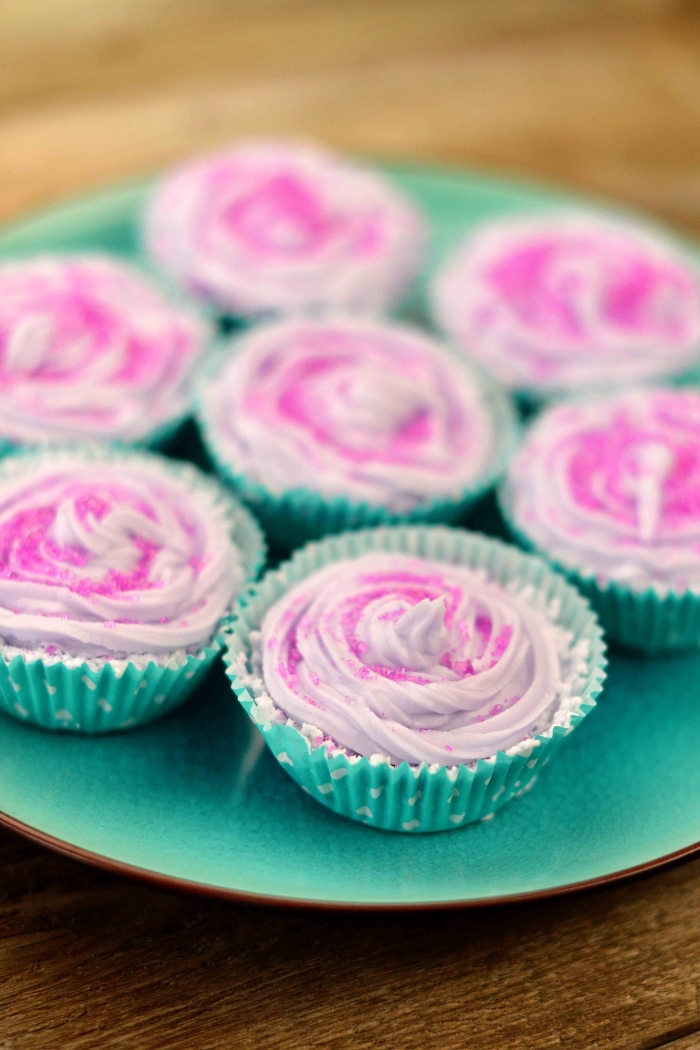
Aren’t they lovely?
cupcake bath
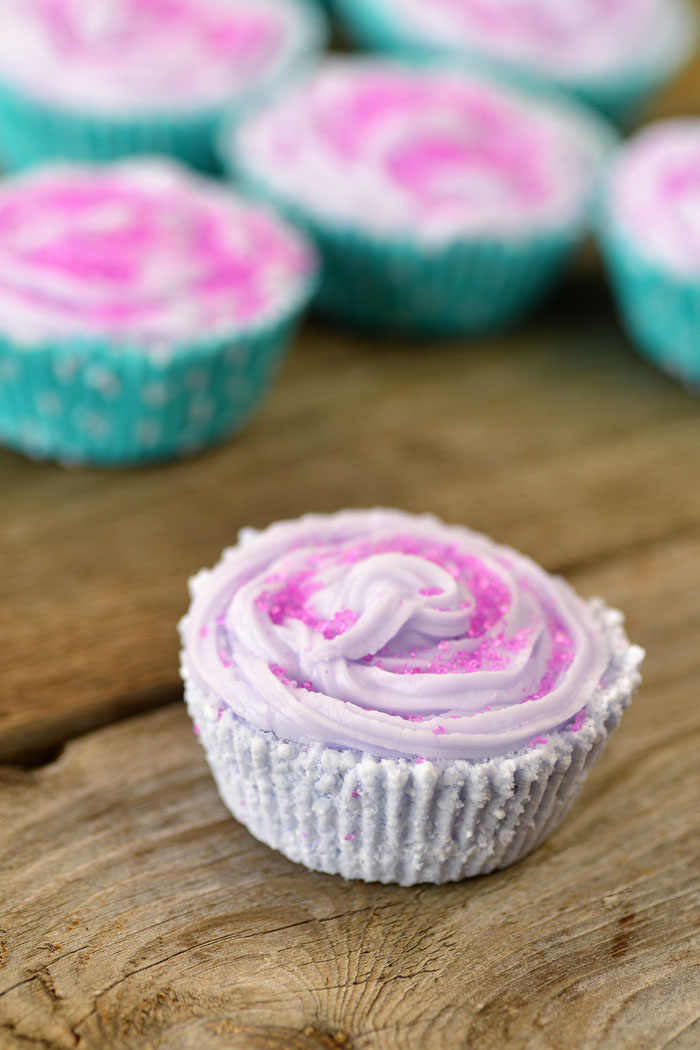
If you are giving these as bridal shower favors, wrap them in cellophane bags or small boxes and add tags. This is how they look when they are unwrapped:

Tuesday, May 6, 2014

DIY ~ Wedding Cake: Triple Chocolate

Let's get out of the norm and try a triple chocolate wedding cake instead of all the white ones!


Ingredients:
1 1/2 cups self-raising flour
1/2 cup plain flour
1/2 cup cocoa powder
250g (9 oz) butter, chopped
1 tablespoon oil (not olive oil)
200g (7 oz) dark chocolate, chopped
1 1/2 cups caster sugar
1 tablespoon instant coffee powder
2 eggs, lightly beaten
Chocolate Fudge Frosting:
90g (3 oz) butter
1/3 cup water
1/2 cup caster sugar
1 1/2 cups icing sugar mix
1/3 cup cocoa powder
1. Preheat oven to 160 Celsius (315 Fahrenheit). Grease a 20 cm (8″) round springform cake tin and line with baking paper.
2. Sift flours and cocoa powder into a mixing bowl.
3. In a saucepan, combine butter, chocolate, oil, sugar and coffee powder with 1 cup of water. Stir over low heat until the chocolate has melted and become smooth. Let cool for about 10 minutes.
4. Add the chocolate mixture to the flours and whisk until just combined.
5. Add the eggs one at a time and mix well.
6. Pour into the prepared cake tin (one with straight sides like a springform tin) and bake for 1 1/2 hours or until the skewer comes out just clean. Let cool completely in the tin.
7. Once cool, cut the top so that it’s flat then turn onto a plate (the bottom is now the top!)
To make the frosting:
1. Combine butter, water and caster sugar in a small pan, stir over heat without boiling until the sugar is dissolved.
2. Sift the icing sugar and cocoa into a medium bowl. Stir in the hot butter mixture in batches.
3. Cover, refrigerate for one hour or until thickened then beat until spreadable.


To assemble, make sure you use only a small amount of frosting in between layers and coat your cake only when cooled. Use a hot knife to smooth the surface if that is what you want to achieve.


Monday, May 5, 2014

How to Use the Chatlr Application for Tumblr

Ever wanted to chat on Tumblr in a way that's more private than reblogging text posts and more effective than simply messaging back and forth? While there is no integrated chat feature for your tumblelog, there is a chatroom-like Tumblr application known as Chatlr. By following the instructions in this article, you'll learn how to set up and use Chatlr
  1. Use the Chatlr Application for Tumblr Step 1.jpg
    Log in to Tumblr using the email and password associated with your account.
    Then go on to Chatlr.com.

  2. Use the Chatlr Application for Tumblr Step 2.jpg

    You will be redirected to a Tumblr URL. Click the “Allow” button to allow the Chatlr application access to your Tumblr account.
  3. Use the Chatlr Application for Tumblr Step 3.jpg

    You will be taken directly to the main Tumblr chat screen. Choose or create a room to chat in the bottom left corner.
  4. Use the Chatlr Application for Tumblr Step 4.jpg

    Type your messages in the text input field along the bottom of the screen. Send them by hitting “Enter” on your keyboard.
  5. Use the Chatlr Application for Tumblr Step 5.jpg

    Your messages and messages from others are shown the large panel on the right.
    You can publish chat posts consisting of these messages by clicking the on “Chat” icon at the top of your Tumblr dashboard.

Monday, April 21, 2014

How to Remove an Application Off Your Twitter Account

Did you try this new application on Twitter and then realized that it was annoying for your followers? Maybe it kept tweeting weird stuff and sending weird DMs to others? Read on and you will know how to delete any applications that you do not want to keep in a second!
  1. Remove an Application Off Your Twitter Account Step 1 Version 2.jpg
    Log on to your Twitter account.
  2. Remove an Application Off Your Twitter Account Step 2 Version 2.jpg
    Look for the "gear" in the right-hand corner.
  3. Remove an Application Off Your Twitter Account Step 3.jpg
    Click on "Settings"
  4. Remove an Application Off Your Twitter Account Step 4 Version 2.jpg
    Go to "Apps"
  5. Remove an Application Off Your Twitter Account Step 5 Version 2.jpg
    Click on "Revoke Access" to remove the app that you want to stop accessing your Twitter account

Monday, April 14, 2014

How to Mark Your Direct Messages As Read on Twitter

Direct messages on Twitter can be sometimes very annoying if you get many of them. Marking them all as read at once can be a good way of removing them from your view without having to sift through each one.

  1. 1
    Sign in to your Twitter account. Type in your username and password.

    Twitter_step_1_974.png
  2. Send a Direct Message on Twitter Step 3.jpg
    2
    Click on the gear icon. You can find it on the top right of your homepage, to the right of your search bar.
  3. 3
    Select "Direct Messages." It's the first option from the top of the drop-down menu. A new window will pop up.

    Step_10_930.png
    • Alternatively, you can click on 'Me' and press the messages icon.
      Step_3_976.png
  4. Step_4_518.png
    4
    Click on the 'tick' icon. This means that you want to mark the direct messages as 'read'.
  5. Step_5_488.png
    5
    Once you do click on it, click on 'Mark all as read'.
  6. Step_6_254.png
    6
    Finished. When you done, you'll realize that there will be no more of the blue circles.
    • And, also your profile won't have a number next to the message icon.
      Step_7_977.png