Pages

Showing posts with label crafts. Show all posts

Monday, May 5, 2014

DIY ~ Blooming Fonts

Write any message or any name you want with amazing blooming fonts and give the most ingenious gift ever to the people you love.


Follow this simple tutorial:


What You Need :

  • paper mache letters (there are 8″ and 12″)
  •  exacto knife
  • floral foam
  • glue gun
  • wire cutters or strong scissors
  • silk flowers


How To Make :
1] Using an exacto knife, cut off the front of the letters and hollow out carefully.
2] Cut floral foam into shapes that fit letter and secure with glue
3] Trim the silk blooms off, leaving a short stem, and position into the foam. You can reinforce with glue, if necessary.
4] Arrange happily!


DIY ~ Amazing Candle Craft Ideas

Everyone loves candles, especially when they come in amazing and inspiring looking vases. This is a very easy and fast tutorial on how to create your own unique candle jars that you can decorate any way you want. They make an excellent gift for any occasion for yourself or anyone you love.


Visit us on: www.mymisi.com and browse around more amazing gifts! 


Thursday, April 3, 2014

DIY ~ Easter Craft: What to Do With Those Plastic Eggs


I got out my Easter bins a few days ago. Why is it that I always think I have way more cute holiday decorations than I actually do – lol? What I discovered is that I have approximately 5 million of those cheap, plastic Easter eggs.

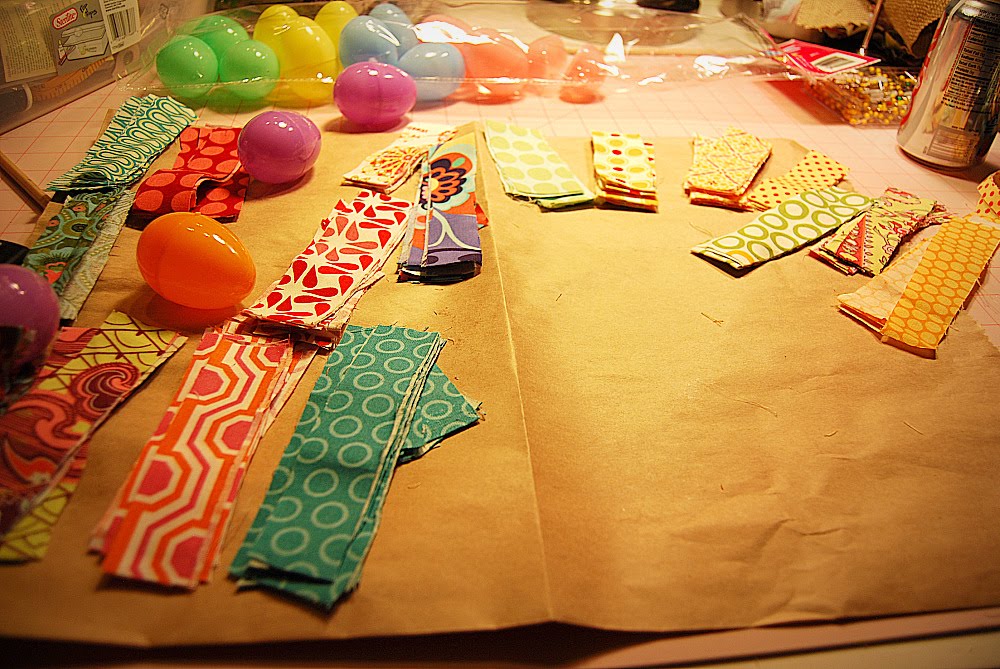
So I decided to do something with some of them. I took my leftover fabric scraps and decoupaged the eggs. So if you’re like me with a million of those eggs, take some of them and transform them into something that you actually want to keep!

This is what I did:
First take your eggs and apply some glue to keep them closed. I used super glue.
Then take your fabric and cut it into small strips. It depends on how big your eggs are, I cut mine in 1 inch x 4 inch strips. Then I made some cuts around the edges of the material — this will make the material mold to the egg’s shape much better. To save time I cut about 6 layers of material at once into strips, then took all six layers and made cuts in the sides of the strips. I cut some of the strips in half – 1 x 2 inches to fill in gaps at the end.
{Note: I used a bristle paintbrush to do this — actually a stenciling brush. I found that if you use a brush with bristles, you can apply pressure at the end and smooth out wrinkles and air bubbles.}
Apply a coat of decoupage medium to the back side of the first strip, not directly onto the egg. Now lay the first strip onto the middle of the egg, right over the opening. Smooth it down with your fingers. Don’t put any decoupage medium on the outside of the fabric until the whole egg is covered. This will cut down on having your hands covered in Mod Podge. I also kept a damp washcloth right next to me. After each egg I wiped my hands off. 

Now apply the next strip of material, making sure to cover the back of the fabric in decoupage medium. I applied the strips to the naked parts of the egg first and then covered up the holes at the end. 

Once the whole egg is covered, smooth down the wrinkles. NOTE: your egg is going to have wrinkles, you are just trying to make it as smooth as possible. 

Then add a thick layer of decoupage medium over the whole egg and lay it on wax paper to dry.


Tuesday, March 18, 2014

WOW FOR MOM

Here’s a fun card for Mom at Mother’s Day. It can be made for Grandmas, or other Mother’s you think are fabulous. It’s also a great activity for students to do in class, to take home to their Moms.
Fold your paper in half. Write the word MOM at the bottom of a paper, cardstock paper would work best. Then open up the card and trace over the same “MOM” letters on the inside. It will form the word “WOW” at the top.
Mom’s won’t expect to see the trick word on the inside. When they open up the card and see the word “WOW”, they’ll feel wonderful!
I also like to spell words with the letters W O W too. Like Wise Older Woman, Wacky OriginalWatcher, Wildly Offroad Wonderer, or Wonderful Omniferous Woman (omniferous means bearing everything).

Wednesday, March 5, 2014

Listing Tips ~ How to Price your Handmade Products


Handmade products take a lot of time and effort to produce. In order to make them worth it, you'll have to do some budgeting to decide how much you can sell them for. Consider the following steps to decide a price for your handmade products.

1. Research the demand for the product.

The price of the handmade item that you are selling is very dependent on how high the demand is for the product. Take the time to figure out the popularity of the item by visiting local retailers as well as online stores to get a sense of what is out there. Note how much these products are going for at different places to give yourself a starting point.

2. Keep track of your man hours.

Handmade products can generally be sold for more than commercially made items due to the amount of man hours that are put into each item. Identify how long it takes you, on average, to make each item and adjust the price accordingly.

3. Consider material costs.

There are some items you buy once and can use for many homemade products. There are others, though, that you will buy to be used once for each item you make that should be incorporated into the final price of the item. The materials you use over and over will be absorbed into the overall costsof your handmade product business.

4. Remember to allow for a profit.

Yes, account for the time you put into the product and the material costs, but don't forget to make some money. Although it should be within reason, the idea is that you will profit from each item sold rather than just breaking even. In the beginning, you may just break even, but that's because you had to invest a lot of money to get your sales off of the ground. Once you break even, though, you should make something on top of the given costs of each item.

5. Factor in shipping, transportation and other overhead costs.

If you have a storefront, don't forget to budget in your monthly rent. Online sellers will have to factor in shipping and web site maintenance costs. And, if you are going to do in-home parties to sell your homemade products, remember to take into account your transportation costs.

source: wikihow.com

image source: pulpsushi.typepad.com