Pages

Showing posts with label decoration. Show all posts

Thursday, April 3, 2014

DIY ~ Easter Craft: What to Do With Those Plastic Eggs


I got out my Easter bins a few days ago. Why is it that I always think I have way more cute holiday decorations than I actually do – lol? What I discovered is that I have approximately 5 million of those cheap, plastic Easter eggs.

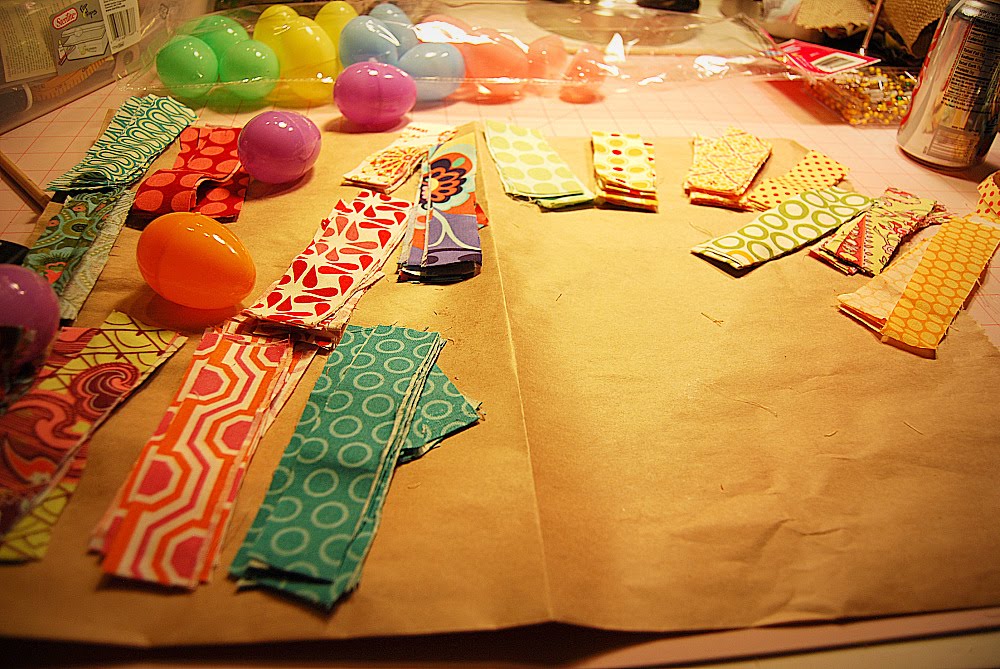
So I decided to do something with some of them. I took my leftover fabric scraps and decoupaged the eggs. So if you’re like me with a million of those eggs, take some of them and transform them into something that you actually want to keep!

This is what I did:
First take your eggs and apply some glue to keep them closed. I used super glue.
Then take your fabric and cut it into small strips. It depends on how big your eggs are, I cut mine in 1 inch x 4 inch strips. Then I made some cuts around the edges of the material — this will make the material mold to the egg’s shape much better. To save time I cut about 6 layers of material at once into strips, then took all six layers and made cuts in the sides of the strips. I cut some of the strips in half – 1 x 2 inches to fill in gaps at the end.
{Note: I used a bristle paintbrush to do this — actually a stenciling brush. I found that if you use a brush with bristles, you can apply pressure at the end and smooth out wrinkles and air bubbles.}
Apply a coat of decoupage medium to the back side of the first strip, not directly onto the egg. Now lay the first strip onto the middle of the egg, right over the opening. Smooth it down with your fingers. Don’t put any decoupage medium on the outside of the fabric until the whole egg is covered. This will cut down on having your hands covered in Mod Podge. I also kept a damp washcloth right next to me. After each egg I wiped my hands off. 

Now apply the next strip of material, making sure to cover the back of the fabric in decoupage medium. I applied the strips to the naked parts of the egg first and then covered up the holes at the end. 

Once the whole egg is covered, smooth down the wrinkles. NOTE: your egg is going to have wrinkles, you are just trying to make it as smooth as possible. 

Then add a thick layer of decoupage medium over the whole egg and lay it on wax paper to dry.


Tuesday, April 1, 2014

CREATIVE WAYS TO DYE EASTER EGGS

Hop to it! These pretty Easter egg dyeing techniques are perfect for the kid in you. These dyeing and decorating ideas, including pretty egg coloring ideas and embellishments you can create with crafts supplies, ensure you'll have a very happy Easter.

Drizzled Easter Eggs


To make these swirled Easter eggs, simply pick a few complementary colors and get started! Drizzle egg with rubber cement, let dry, then dip in a dish of dye. When dry, gently peel off the rubber cement. Repeat two (or even three!) times with additional colors.

Chirping Chick Easter Eggs

These so-cute (and so-creative) Easter egg chicks are surprisingly easy to make. Dye white eggs canary-yellow, let dry, and glue a quill feather to the top. Cut out a beak from orange construction paper and glue it on. Use a marker to make two dots for eyes and place your feathered friend in a piece of cracked eggshell set in a nest of raffia.

Natural-Dyed Easter Eggs

For a fresh take on dying your Easter eggs, go all-natural! These Easter egg dye recipes are all food or plant-based and create beautifully subdued shades. Just simmer beets, blueberries, or other natural ingredients in a cup of water with a dash of vinegar to create the colors. Leave eggs soaking in the dye in the refrigerator overnight for the richest colors; just a few minutes will work for more subdued variations.

Metallic-Dipped Easter Eggs

We love the way golds and silvers add a sophisticated touch to even the simplest of decorations. To make this Easter egg design, turn to metallic-hue paint pens after dying your eggs. Simply draw whatever suits you, from polka dots to stripes to a dip-dyed effect.

(Better homes)

Wednesday, March 19, 2014

Fabulous Fridays... The Interview ~ Vintageellie

It's Friday! - I think we are all happy about this - so we have a brand new interview for you. We are pleased to present you Vintageellie, two sisters who run the professional business Bespoke Vintage Castle!

With over 55 colours unlimited fabrics, exceptional designs and an excelent quality service, they offer unique items created with love and creative flair, from wedding centerpieces and supplies to childrens personalised items and chic home furnishings.


Let's meet them:

1. Speak a bit for yourself or introduce yourself. Besides crafting, what else do you love doing?

Hello, my name is Lizzie (Elizabeth) and with my younger sister Jazzie (Jazzmine) last year October 15, I officially started Bespoke vintage castle and at the time MADE my younger sister do it, now we share the vision and are equally inspired and passionate as to what we can achieve.

Besides crafting, I am a wife and mummy, which takes up a lot of my time and a voluntary youth worker with my husband. We travel, giving talks to young people and help raise money charity work with youth and vulnerable young women.

Jazzie, besides crafting, likes music playing piano, singing and songwriting.

2. How did you start crafting and how long have you been doing it?

We have both been crafting all our lives, our mum was a fashion designer in the 80's, hence Jazzies studying textiles - now its genetic! Jazzmine is into fashion, designing, and being abstract with her art. 
I have been into making and up cycling from being a teen. We went to a lot of car boot sales the three of us and practically lived in auctions! My mother, sister and me we were always trying to find antiques. Its a hobby that when we have the time now we still try and do.

3. What are the problems you faced as a crafter until now? Do you have an advice for someone that thinks to start or is new to crafting business?

The one problem I have had is when I was trying to book a stall at a popular event and venue. I was talking to the organizer for months and being completely ignored. In the end they basically said "We will get back to you". They have standards and only want people who have shops and things they like and not people that work from home. At that time I felt discouraged and that my work was not good enough and I should stop, but my husband encouraged me and then I decided not to let one person change my destiny and it would only make me more determined to work harder. 

My advice to anyone starting a new business would be: Once you have a vision, go for it, aim at you're dreams and don't stop till you get there! 


4. What's your favourite crafting category?

My favorite thing to craft is wedding bouquets and hairpieces. The sky is the limit with imagination and ideas you can literally creating anything to put on someones head or for them to hold! 

Jazzie loves making boys bow ties best.

5. What is your main source of inspiration? How do you propel your creativity?

We are inspired in crafting from the antiques I have seen at car boots and vintage fairs. I love history - it is my greatest inspiration and I research period living customs and traditions. We also adore the Victorians, Marie Antoinette, and classic french living. The rustic timeless and ornate things they used to have back then are our ultimate inspiration. I love the fabric manipulation of grand silks and the luster of the Georgian color palette. In fact this is why we work with silk, dupion, cotton, satin, taffeta, organza, chiffon, vintage buttons and brooches and lashings of original Nottingham lace

Jazzmine says shes inspired by things around her, the littlest things in nature, or events daily life inspire her colors, work and design.

I propel my creativity by my research and I love watching the great British sewing bee and Kirstie Allsop "Homemade, home". I also watch wedding TV and bridal programs to be up to date with current trends. We both love pinning on Pinterest and reading in the library. 


6. Tell us about your crafting space. Do you have a favourite material and tool?

We both work from home and I have converted a room into a work space. Initially I was in my dining room  now in a room, but I know I will have to rent a little space soon as a studio, as clients are increasing and I am taking more orders,which is fantastic! 

My sister has a room at home that's full of crafts, paint and fabric. Sometimes she comes to mine or I raid her stuff, but all of this will go to our studio, once we have a space.


7. So your crafting space transmutes to an online shop. How do you promote your e-shop, which social media you use?

We are taking over social media. It's confusing to keep posting, tweeting, pinning,liking.whew.. 

Here are our links: Facebook, Pinterest, Instagram, Polyvore, Blog

8. How long after listing an item into your e-shop you had your first sale?

It took us 4 weeks to make our first sale! It was supplies glass mirror plates and then a week later we sold a tutu skirt to my first international customer (USA)

9. Where do you see your business in 10 years from now?

Oh my, in ten years time! Well, we have agreed that we would love for us to be a brand name, like Vera Wang or Jenny Packham. We want to have a franchise in every city and be interviewed on TV, be the next Sondra Celli or Thelma Nadine and be on a reality TV show. We would love to be in fashion shows and on runways, own our very own wedding boutique and make lots of money by selling to celebrity clients! Also we want to have written a book and done radio interviews. Ten years! I think that's achievable and we will probably do more.

10. How did you find MISI? What else would you like to see being added to the site?

I first heard about MISI recently through my auntie. She said we should come here as were brave enough and we are fans now, and follow MISI on Pinterest, Twitter and Facebook! 

The site is improving as it goes along. I like it just as it is and we are willing to move along with any updates that happen, were here for life!


Visit Bespoke Vintage Castle

Monday, March 10, 2014

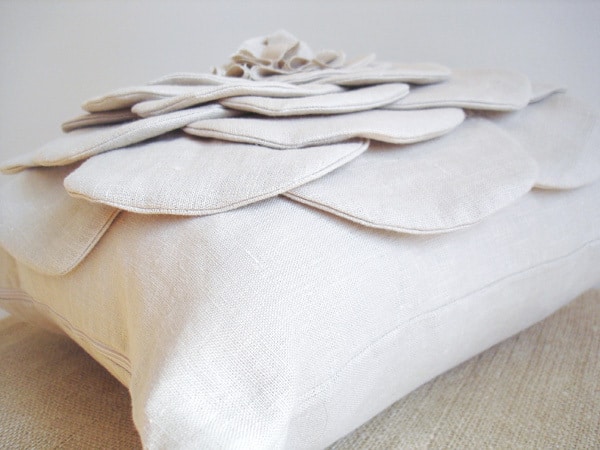
DIY ~ Flower Pillow for Mother's Day

This is truly unique and unconventional way to give flowers to your mother!

DSC020351 shabby flower pillow (a tutorial)

Supplies Needed:
fabric (linen here)
sewing machine
zipper (if desired)

Step 1:

Create your “petals”. 
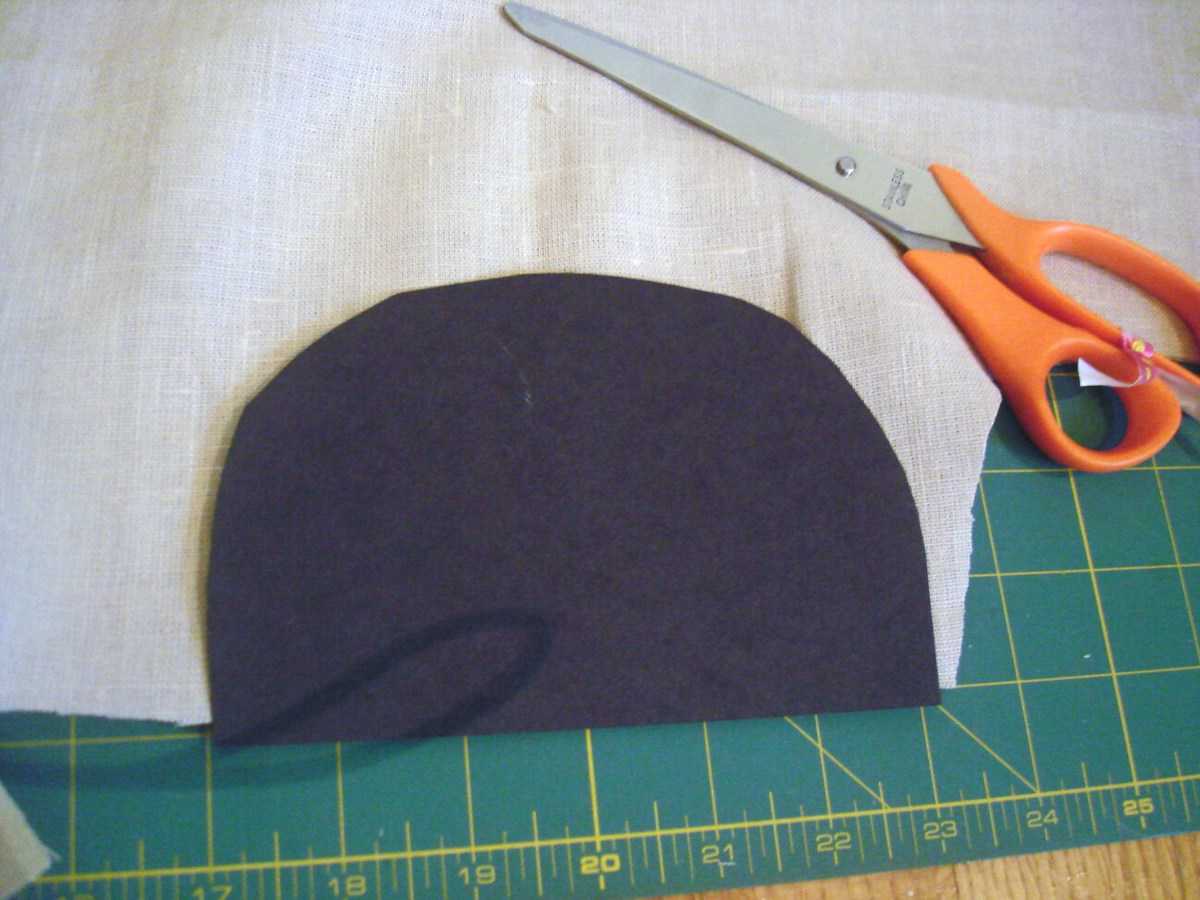
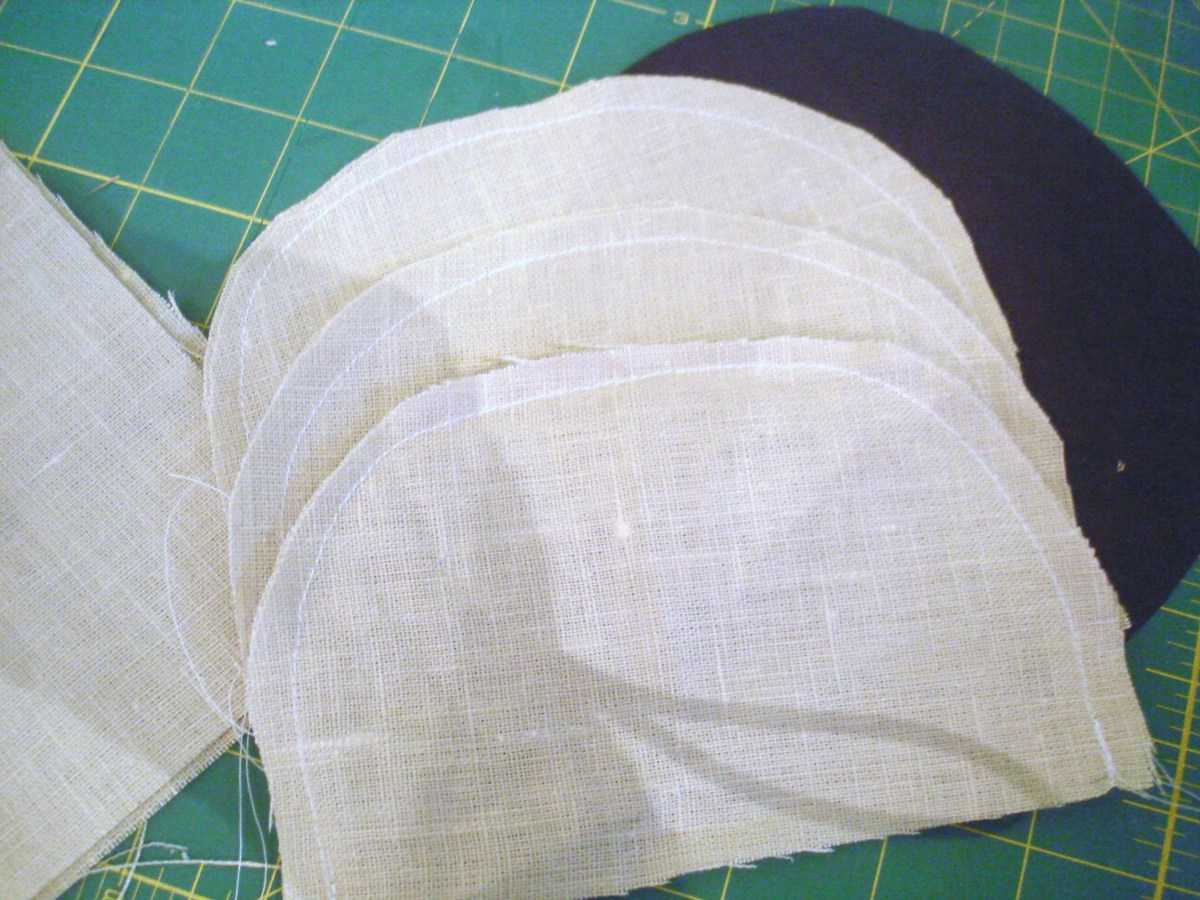
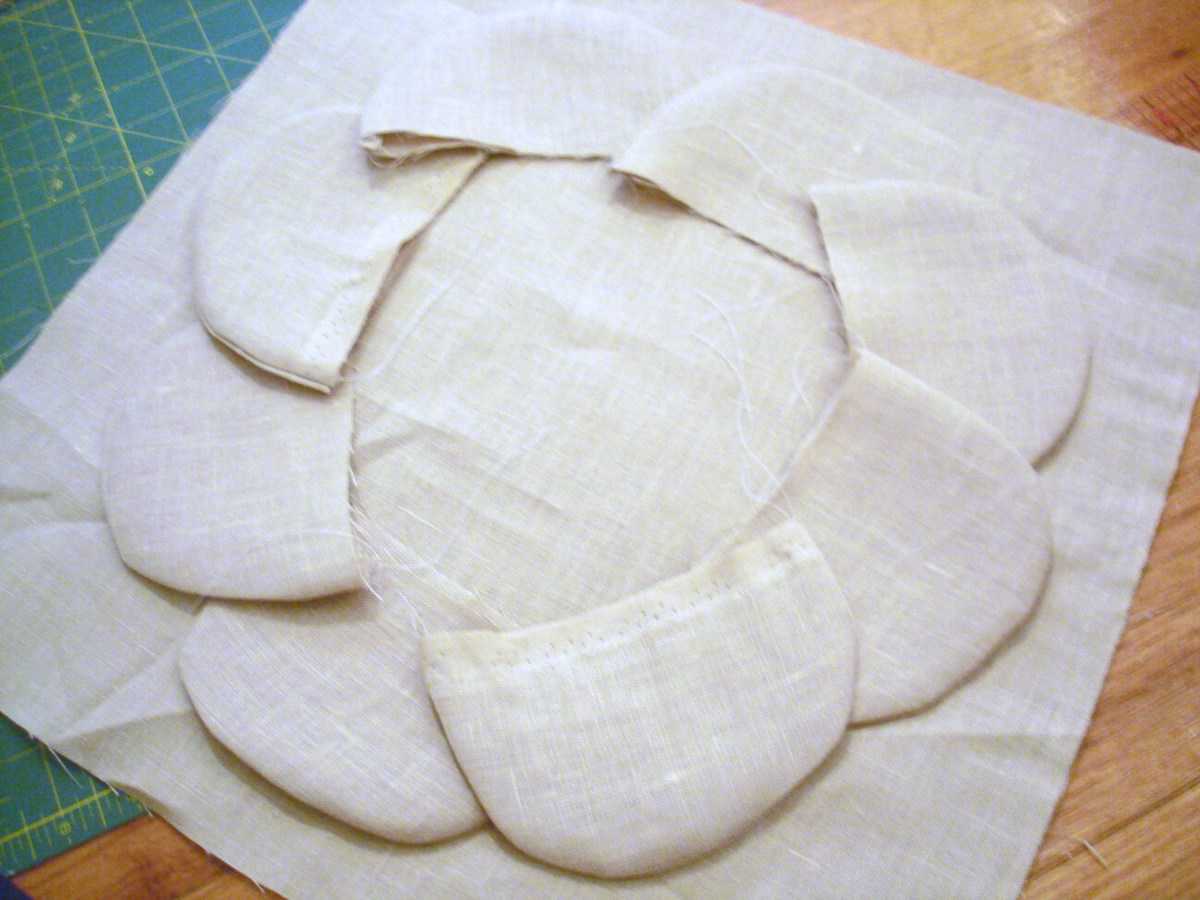
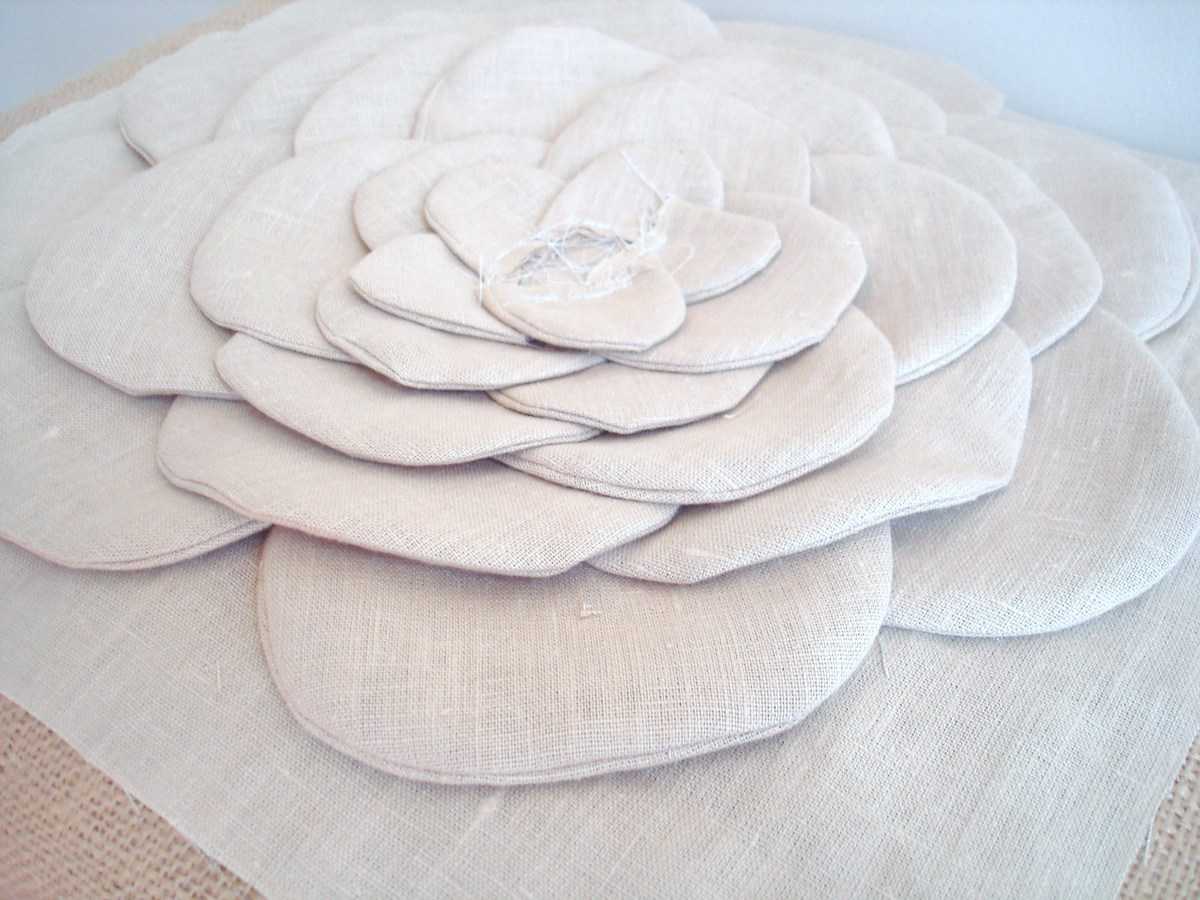
Cut out a half-circle template out of cardstock. Place on a double layer of fabric and cut. Take your two layers of fabric and stitch around the curve.

DSC01996 300x225 shabby flower pillow (a tutorial)DSC01997 300x225 shabby flower pillow (a tutorial)
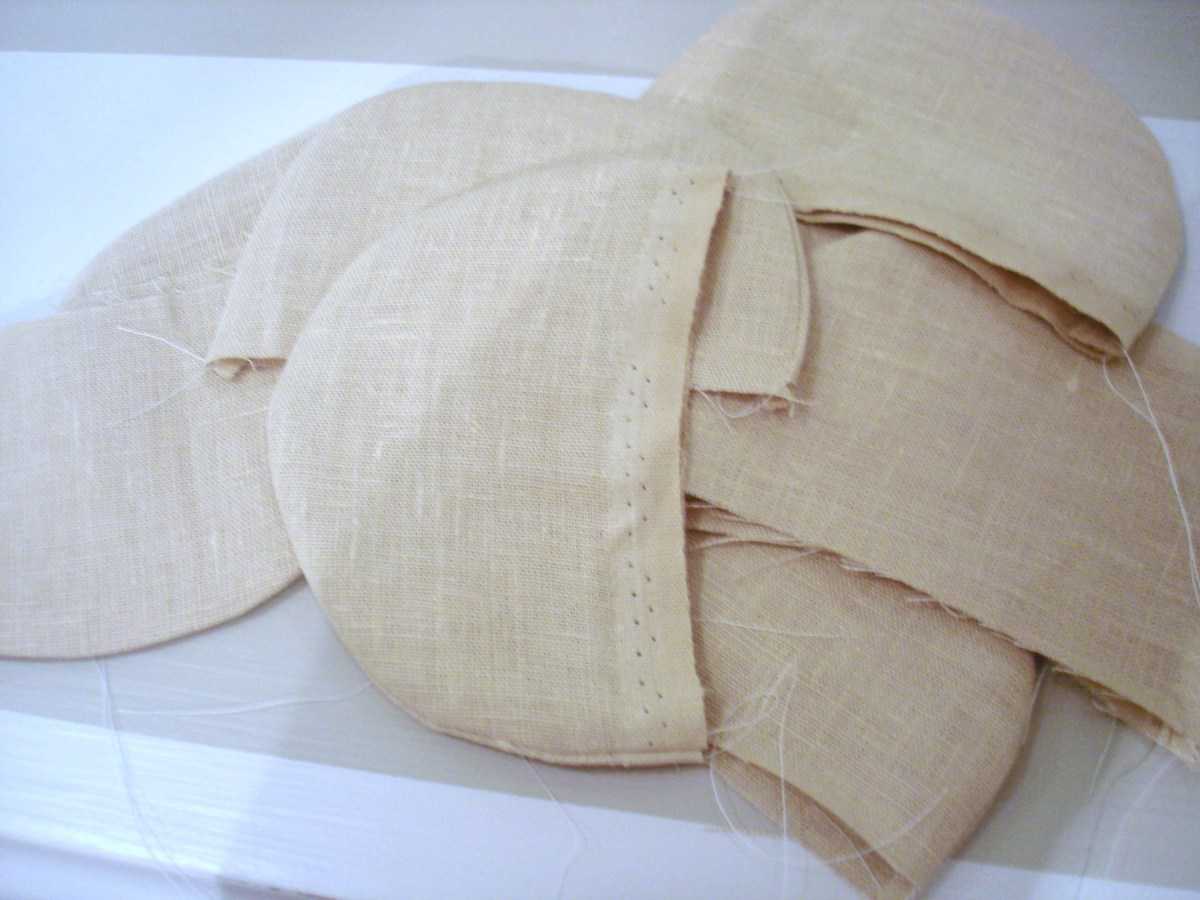
Step 2: Take sew petals and turn inside out. Press flat. Take petals and arrange your first layer on your pillow fabric.
DSC02000 300x225 shabby flower pillow (a tutorial)DSC02002 300x225 shabby flower pillow (a tutorial)
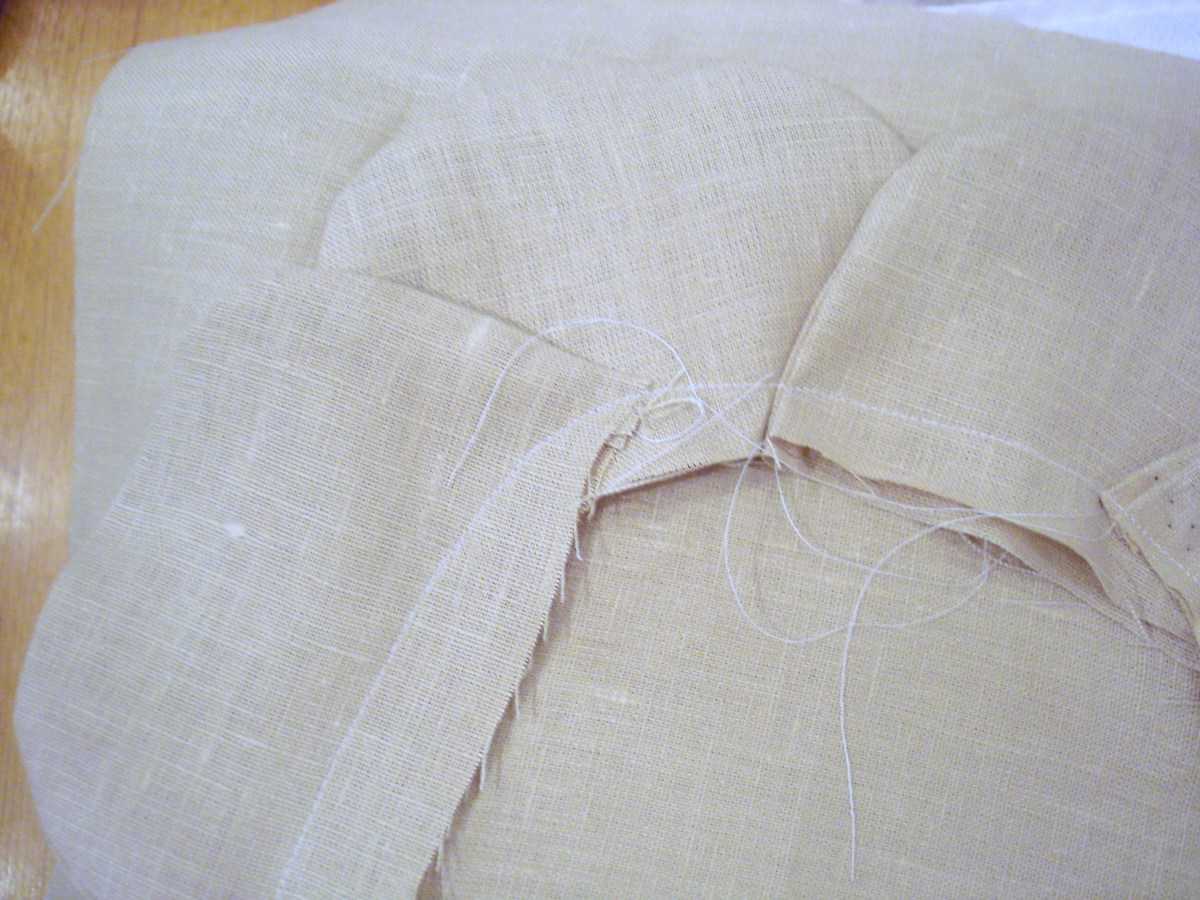
Step 3: Stitch petals down to fabric. Repeat for second layer of petals.
DSC02003 300x225 shabby flower pillow (a tutorial)DSC02004 300x225 shabby flower pillow (a tutorial)
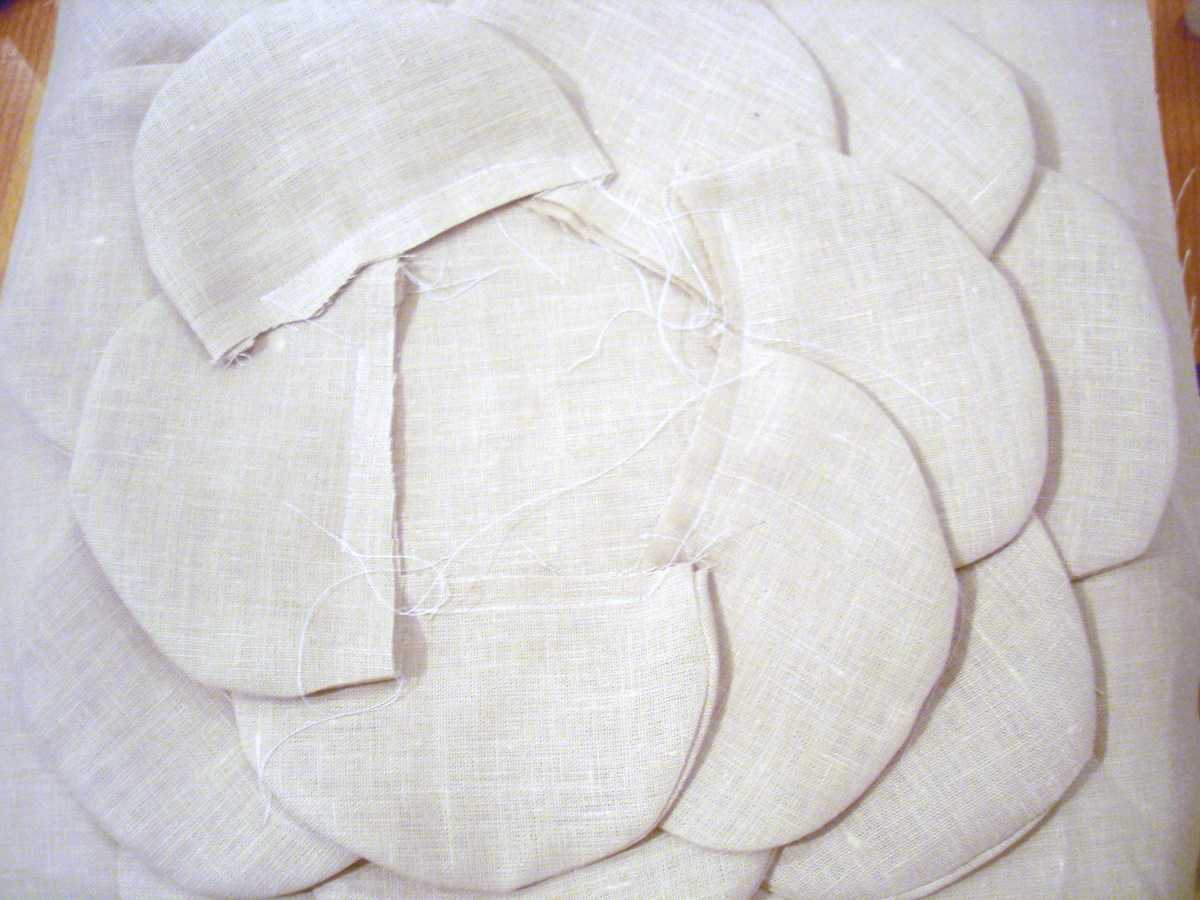
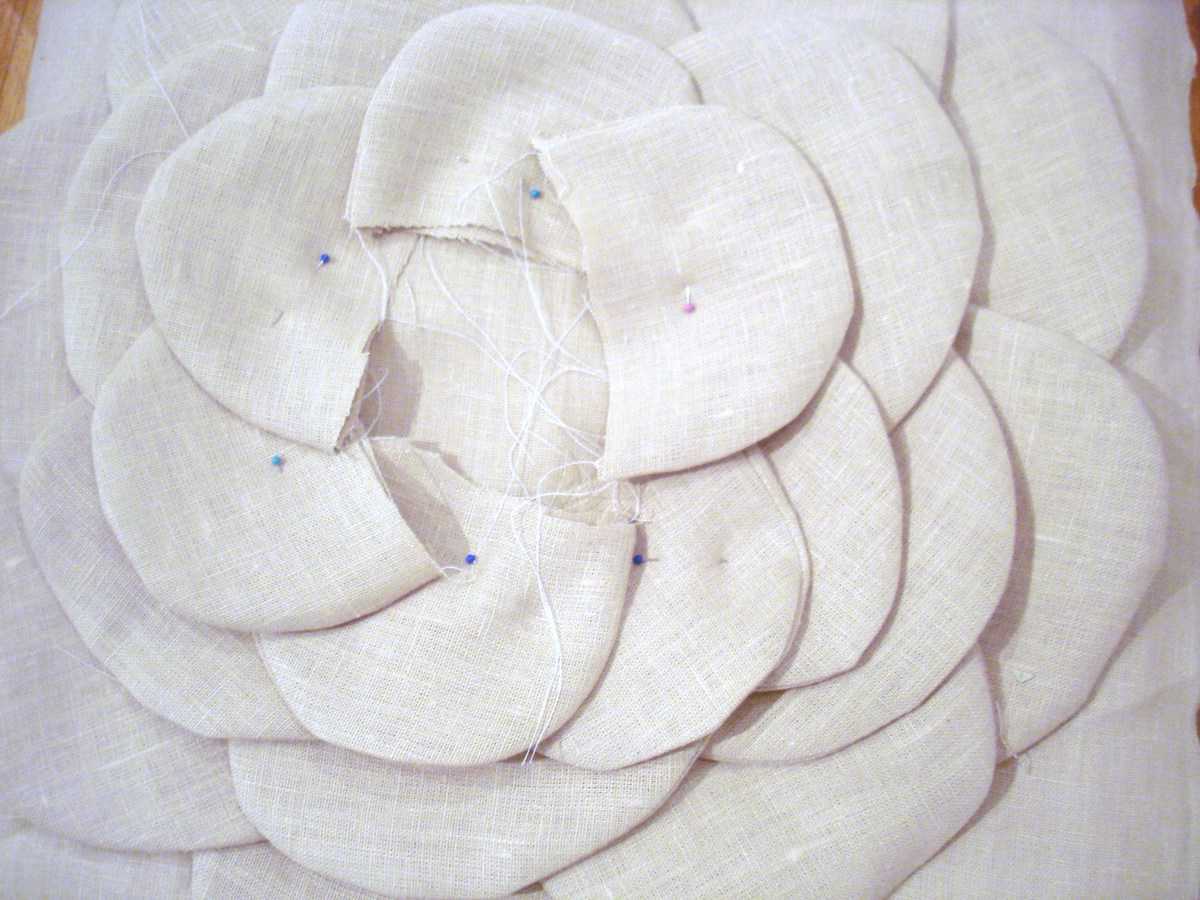
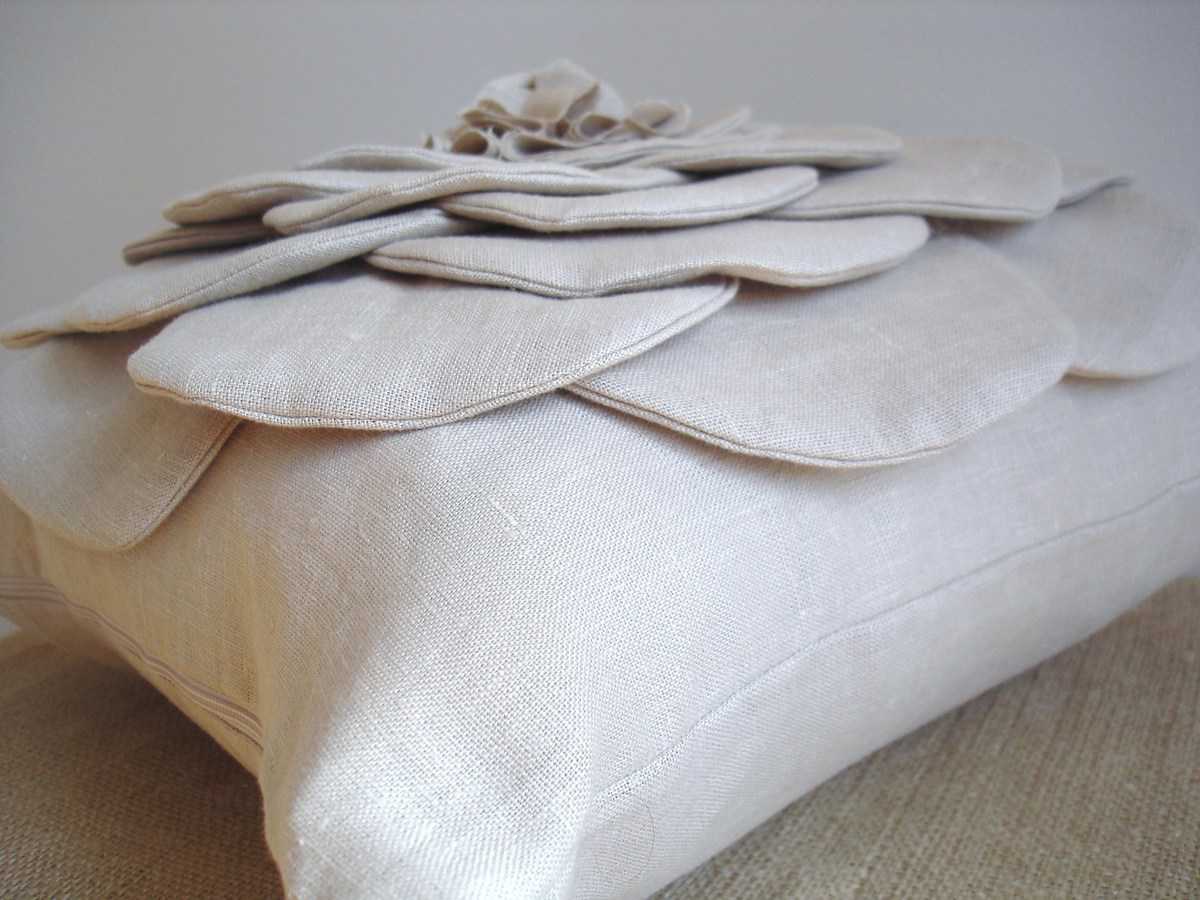
Step 4: Continue creating petals and attaching them to pillow front. Here we did 5 layers total, and, for layers 2-4, we cut down the template and made the petals slightly smaller. Then cut down the template further for the fifth and final layer.
DSC02011 300x225 shabby flower pillow (a tutorial)DSC02019 300x225 shabby flower pillow (a tutorial)
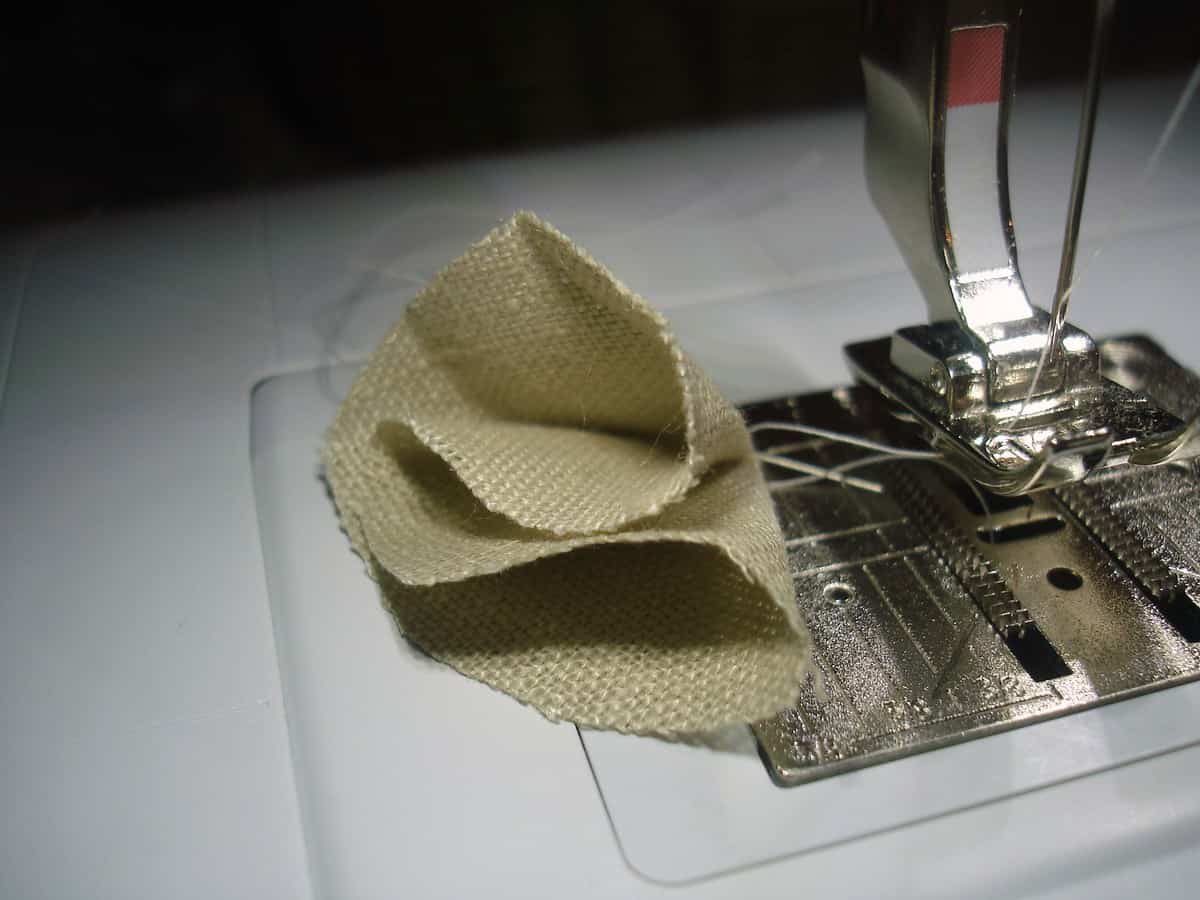
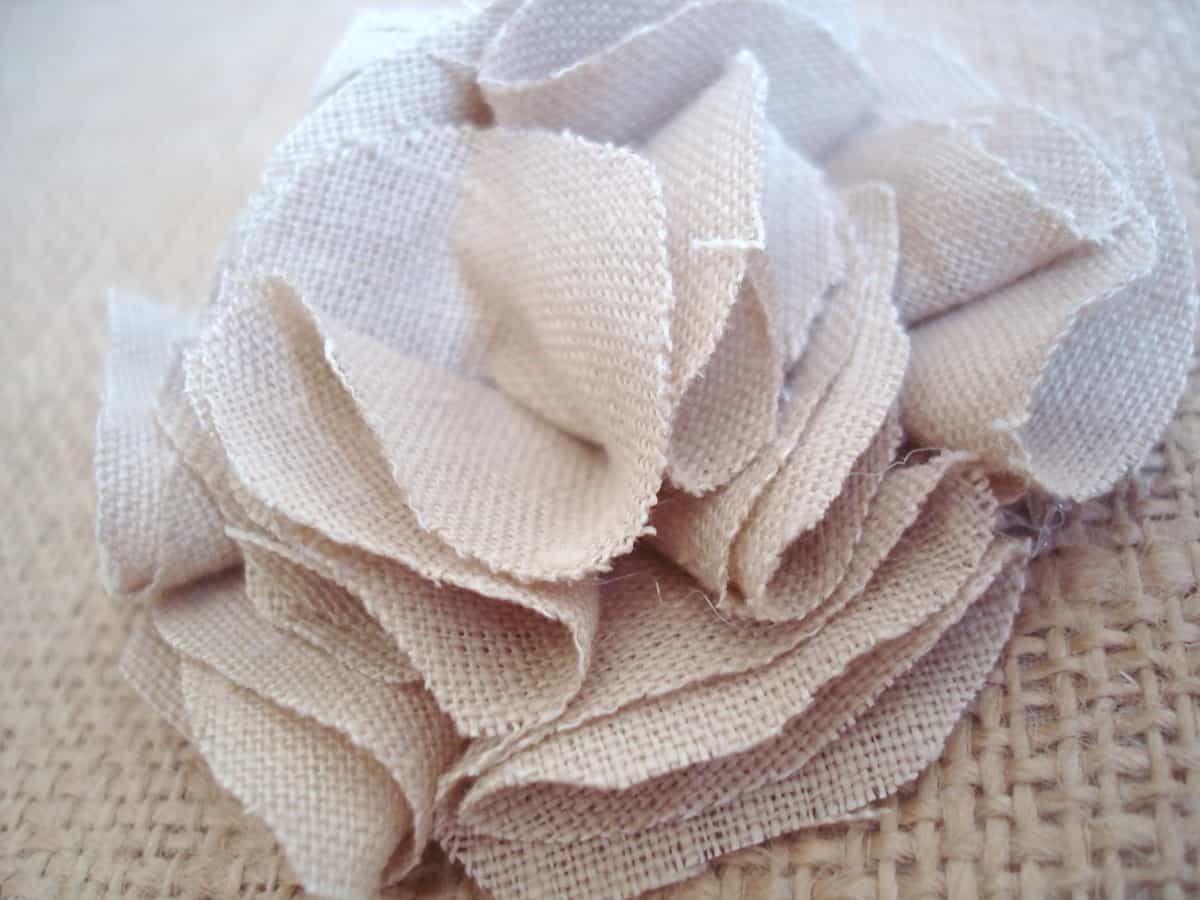
Step 5: Almost there! Now you are ready to create your flower’s center. We did this by taking small circles of fabric and folding them once (into a half circle) and again (folding them into a cone shape). Either hot glue or sew your petals shut. Take your petals and hot glue them into a circle onto a small piece of fabric. Once your outer circle is complete, continue layering and working into the center of the circle.
DSC02014 300x225 shabby flower pillow (a tutorial)DSC02020 300x225 shabby flower pillow (a tutorial)
Step 6: Glue or stitch your flower’s center onto your pillow fabric. Lastly, sew your pillow together in the method of your choice!

DSC02035 300x225 shabby flower pillow (a tutorial)